Pages

5 October 2014

A fun, crazy-print Yaletown Dress

Hi! 

Here's my finished Yaletown Dress from Sewaholic Patterns. My garden looks quite damp in these photos and it is - I dashed out in between a gap in the rain this Saturday to take them. Pretty sure Autumn is just round the corner!


I had a lot of fun making this dress and I'm really pleased with it. The fabric is a gorgeous cotton lawn from The Fancy Silk Store in Birmingham - which I popped to when I had a long wait in between changing trains at Bham New Street station a few months ago. I've so enjoyed working with this fabric, and it's much more opaque than I initially thought - no camisole or slip needed to preserve dignity as I first thought. The print is certainly pretty loud but it's exactly the type of abstract floral type that catches my eye. It reminds me quite a lot of Quentin Blake and also weirdly of the teacher in the Magic School Bus children's books?!?


I was pretty keen to join in with the Sewaholic Sewalong for this dress, as I've never taken part in one before, and it certainly felt good to be sewing at the same time as everyone else! I could probably have completed this on my own, with just the instructions provided, but I picked up some good tips along the way nevertheless (including how to properly understitch - I was doing it wrong before!) 


I didn't make a muslin for this dress as I was fairly certain the loose, forgiving fit wouldn't pose too many challenges. However I did make quite a few alterations to this dress to suit my personal taste - to both the paper pattern and to the dress itself during the making process. And this time I kept proper notes!


I like reading details of alterations on other sewing blogs, particularly as they're incredibly helpful to me as a beginner sewist. I also like when they're all in one place, so I'll try and do this here.

Alterations to the pattern:

  • Graded between size 4 at the bodice and 8 at the waist. There are a good few inches of ease at the bust on this pattern, I didn't want too much loose fabric here for fear I would end up looking a little swamped.
  • I shortened the bodice 1 inch, in order to remove some of the fabric and therefore reduce the amount pooling at the waist. My waist is quite thick so too much fabric around that area makes me look like a bit of a rectangle.
  • Shortened the skirt a good 4 or 5 inches - I do this with all dresses. It's still longer than I would normally wear but I think it's very ladylike.

Alterations during sewing
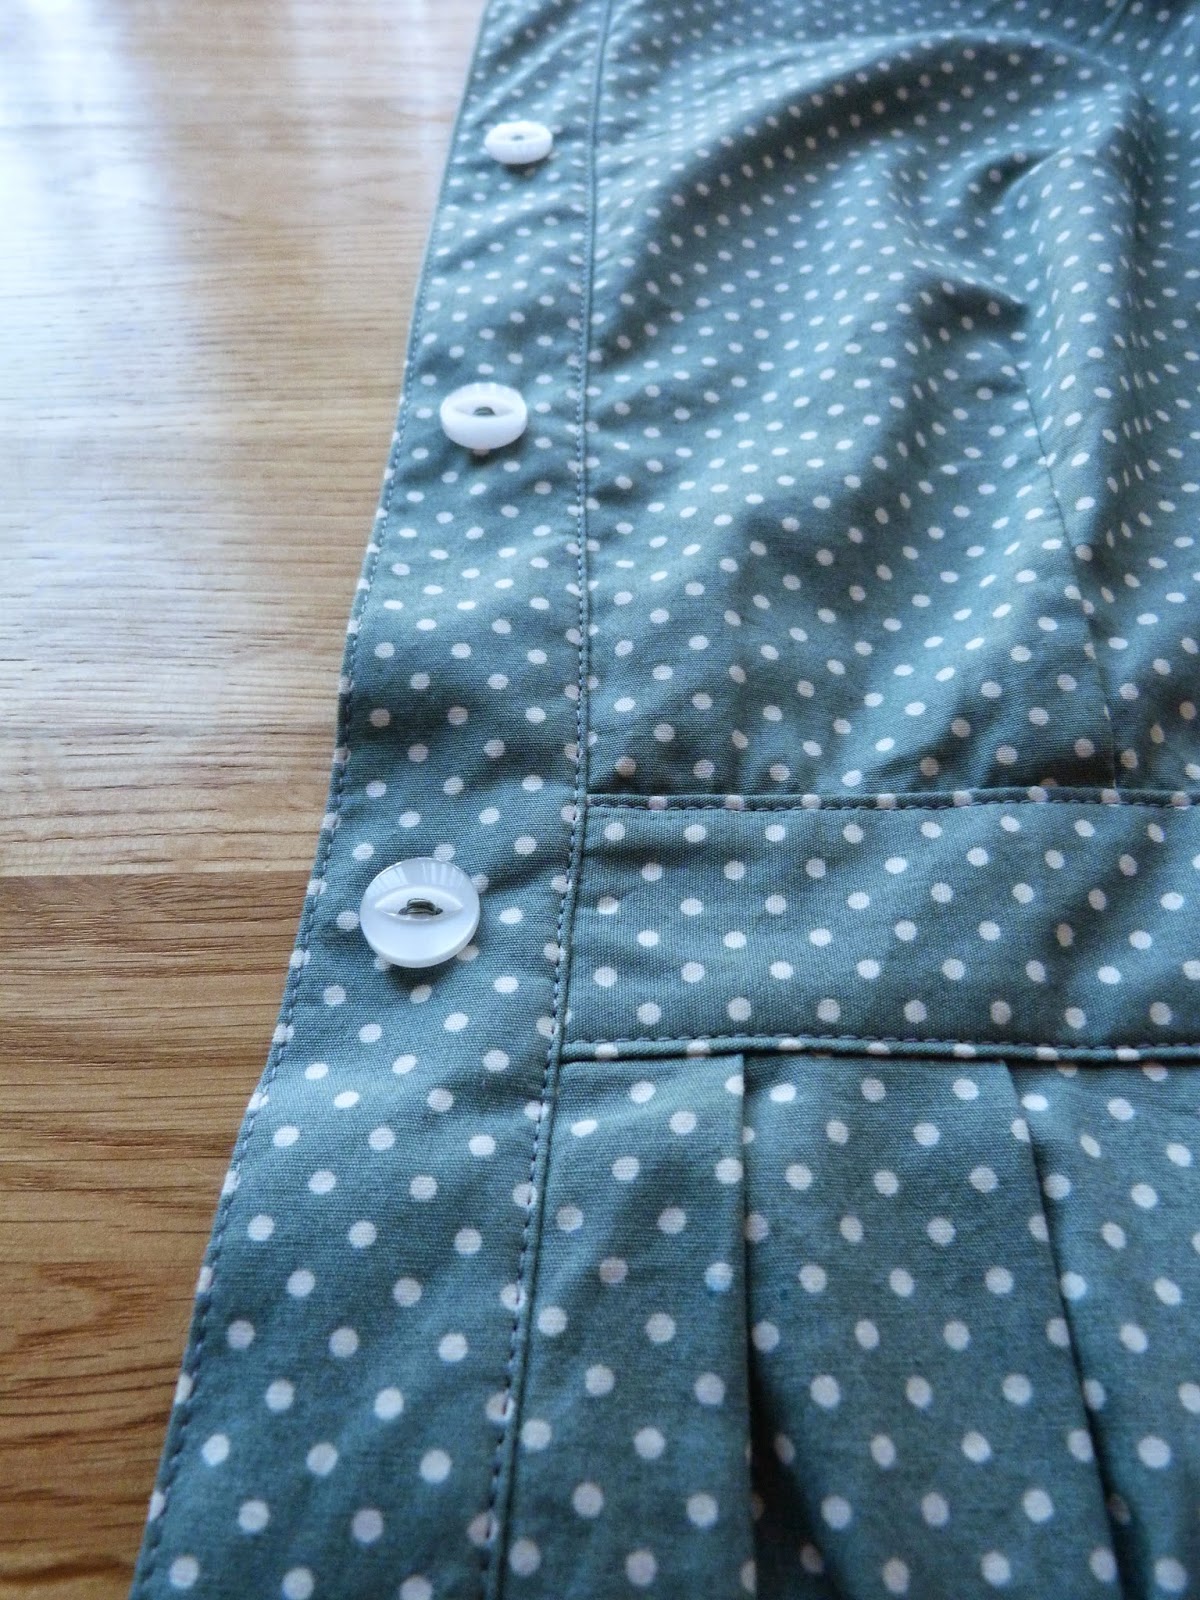
  • Once I'd attached the bodice to the skirt I still felt there was too much fabric around the bust, so I shaved off about an inch from the bodice side seams in a curve that I simply eyeballed. You can see a pic of this below, just before I pinked the hell out of those seams.
  • I made up the belt and decided I wanted it longer so the ties hung lower when it's in a bow. I unpicked the centre seam and added another section to it which increased the length by about 8 or so inches.
  • I did a rolled hem on the skirt, mainly because I'd bought the foot for my machine recently and wanted to try it out. The fine lawn worked well with the tiny hem, and whilst I didn't get it 100% perfect it wasn't nearly as bad as the internet had led me to believe!
  • Finally, and probably the most obvious change, I omitted the flutter sleeves. I tried the dress on half way through and loved it the way it was (even though my sleeve pieces were already cut). I sliced off about 3/4 of an inch from both the top of the sleeve and the bottom of the armsythe and finished them with shop-bought bias binding. The print is so loud that I think adding sleeves to this dress may have been overkill, and having my shoulders on show alongside the deep V of the neckline keeps the dress flirty :) Plus, I find sleeveless dresses more wearable during the winter as it's easier to wear cardigans.
You can see the new side seam by my thumb and forefinger
So, quite a lot of alterations all in all. I'm pleased to have come out with a dress that really suits me and my lifestyle whilst also, I hope, staying true to the original design by Tasia. If I'd have wanted a sleek fitted wrap dress, I'd have bought a sleek fitted wrap dress pattern :) 


I'm looking forward to busting this dress out for the Christmas season with a pair of black tights and high heels, with a nice cardigan and probably a camisole underneath for warmth. 


I don't know when I'll next post, since my next 3 projects are all bridesmaids dresses for my Wedding next September. They'll be quite a challenge as I'm working with silk and sewing for other people, yikes! It remains to be seen whether or not I fit in some selfish sewing projects in between. Wish me luck (any tips much appreciated)!!

3 September 2014

Straight-up Shirt Dress - repeating McCall's 6696

Hi,

Back again after a lovely break in Spain, having spent time in both Barcelona and Valencia. Back to reality a bit now, but I have since finished a repeat of McCall's 6696 - a purple linen shirt dress, this time the sleeveless version with a straight skirt.


As this is my second make of this pattern I'll try not to repeat myself too much. After finishing my pistachio dress I was so damn thrilled with it I immediately started all over again. The purple is a cotton-linen blend which I thought might be interesting to underline as it was a little flimsy and ever so slightly see through. It's underlined in a plain white poly cotton - the result of which has made it totally opaque but also much stiffer. As a result it's turned out more formal than I originally imagined however it's already proved a great dress for work - goes well with boots and tights and also easy to slip a cardigan over my shoulders as well.

Sorry about the string. It's to keep the hanging basket facing the right way!
Several months ago I bought some liberty fabric bias binding on a bit of a whim from Cloth Kits in Chichester - one of my favourite fabric shops which I pop to whenever I'm in town visiting my Nan. I thought it perfect to bind the armholes with. Then I was reminded of Handmade Jane's version of this dress, with it's snazzy undercollar and decided to shamefully copy hers. This involved tracking down the matching liberty fabric, a pretty floral called Sarah's Secret Garden, so my sleeve binding, under collar and pocket lining could all look the same. 


Needless to say, purchasing just half a meter of the liberty fabric more than doubled the price of the project immediately. Oh well, it  will get a lot of wear so I'm not bothered, and got to use liberty tana lawn for the first time without breaking the bank. Plus I love the extra interest the contrasting fabric gives the dress - a detail you'd rarely find in shop bought clothes, which is a big part of why I started sewing in the first place :)


I made a few silly mistakes that meant the construction took a while. On the previous dress I pretty much ignored the hip measurement, knowing that the full pleated skirt would fit anyway. I neglected to do that with this version, and just cut the same size for the skirt that I did for the previous one. Big. Mistake. The thing wouldn't do up over my bum and I'd already trimmed the side seams!! So I did a bit of unpicking and squeezed another quarter inch out of each side seam, and also used less of the seam allowance for the front of the dress where you attach the button band. As a result I think it has gone off grain at the front and the hem doesn't quite line up at the bottom - but as that was very close to being unsalvageable I'm not too bothered. 

Moral of the story - don't trim your side seams until you're sure everything fits! At least I've well and truly learnt my lesson now.


I also found the collar a struggle. With the pistachio dress I found both collar pieces waaaay to large and shortened them both to fit. I transferred the changes to the pattern and cut out shortened pieces and guess what? Way.Too Short. In the end I had to re cut the collar pieces (including the underlining and another piece of liberty fabric!) and used the original collar size which worked fine. Clearly I messed up the collar the first time round.


I'm glad I persevered though (taking a break to start and finish the Flora dress helped) as once again I'm pleased with the outcome - M6696 really is a fantastic pattern and I've learnt an awful lot from it with these two makes. I particularly like the buttons, even though I was doubtful at first. They have a nice pinky purple sheen - and as the colour of the dress is quite bold the fact that they're quite large buttons means they don't get lost in it all.


Time to put this pattern to bed not (to be honest I need a break from buttons, buttonholes and collars!). I'm just preparing to cut my fabric to join the Yaletown sew-along with Sewaholic Patterns which I'm really looking forward too. My fabric is lovely, I'm excited about the pattern, and it's my first sew-along - I can't wait to sew at the same time as everyone else! 


Are you joining the Yaletown sew-along? And what's else is on your sewing table at the moment?


7 August 2014

A bright pink Flora dress

A few months back we were invited to a summer wedding, and I decided I had to make an outfit for the occasion. The dress I was working on at the time was promptly tossed aside and remains unfinished. I usually only have one project on the go, but dress making for weddings takes priority dontcha think?!


I'd seen By Hand London's Flora Dress make the rounds on the blogs earlier this year. I loved the high neck and full, dipped skirt, and thought it would be something a little different to wear to a wedding - I like that my chest and legs are both pretty covered but it's still a beautifully feminine, floaty dress.


My outer fabric is a polyester crepe-backed satin from Fabricland - a scary website but with nice staff at the end of the phone, speedy delivery and above all, rock bottom prices. The fabric is called 'coral' - so I expected it to be a bit more orangey but as you can see it is pink pink pink!


Let's talk about the good things in this project first shall we? Overall, this was an enjoyable, mostly speedy make, with few pattern pieces to cut out. I never trust myself to skip making a muslin as I can't seem to get my measurements correct / always choose the wrong size, so I had a quick go at the bodice. It came out too large, so I promptly made a size smaller in the lining fabric, which was much better. Consequentially that became the actual lining to my bodice. I'm fairly certain I graded out slightly at the waist - I usually do, but I didn't make a note of it! I wanted to make a feature of the shiny satin on the underside of the skirt by making the dipped hem version, but as By Hand London patterns are drafted for quite tall ladies, and the skirt looked veeeeerry short even on them, I lowered the front hem by about two inches and raised the back hem by about another two (I think - again, no notes!). This kept the lovely dipped effect but doesn't swamp my short frame.  


I read that the front and back necklines on Flora gaped somewhat, so I followed this great tutorial and took about an inch from the back and half an inch from the front. The front sits very nicely, the back still gapes a teeny tiny bit but suspect it helped when I wanted to swing my arms about like a crazy person when I was on the dance floor. I also put in my best, most invisible invisible zip so far.


I'm particularly pleased with myself for adding a waist stay, which isn't included in the pattern instructions, with the help of this Sewaholic Tutorial. The crepe isn't great quality material, and the skirt is a little heavy due to it's volume, so I was concerned it may stretch and warp over time. Reading around suggested a waist stay would help prevent this, but the deal wasn't clinched until I found the Sewaholic tutorial and also discovered a firm, stiff ribbon that my Nan gave me several months ago along with a bundle of age-old ribbons, buttons and thread. The above pic shows the waist stay just after I've attached it to the skirt - as per the tutorial by the end it is neatly and invisibly encased within the lining of the bodice.

I've deliberately only shown you the very best bits of the skirt hem in this shot!
I did bound seams for the first time. I had planned to do this in a contrasting colour from the very beginning. Initially I hoped to make a purple Flora, with green contrasting seam and hem binding, but then I discovered that the Bridesmaids were wearing purple, so I changed tack and went for pink and blue. This is satin bias binding from John Lewis' haberdashery. As it happened, I had little choice but to bind the seams  - the fabric frays really, really badly, I don't have an overlocker and dislike the finish when you do a zigzag stitch on the machine. The bound seams are a bit sloppy, particularly towards the waist which depressed me a little but as noone can see these I got over it.


Okay, and the not so good about the dress? That blasted. circle. skirt. was almost a deal breaker. I knew curves weren't easy to hem, but this was a demoralising nightmare. Putting together the dress, including tracing (yeah I trace too), cutting, muslin-ing and sewing took about three weeks. The circle hem took a further two. I bought a shiny blue ribbon and followed By Hand London's tutorial for a tape hem finish, but clearly messed up somewhere as you can see from this wobbly mess above. I think there was a lot of slipping and puckering when I first machine stitched the ribbon to the hem and my catch stitch is probably not the best. Possibly I should try bias binding next time? I plan to use circle skirts in some pretty important projects in the not too distant future so need to get better at this. If anyone had any tips I'd be most grateful!


This tends to happen to me with dresses. The waistline of the bodice and the waistline of the skirt end up not being the same measurement when I attach them, as you can see above. With the Flora, my skirt waist ended up being almost an inch shorter. I think it's possibly because when I stay stitched the skirt waist I puckered the fabric up slightly? Perhaps my non-stretchy ribbon I used as a waist stay is the culprit? But losing an inch seems a bit extreme, does anyone have any suggestions? Luckily, I still had enough seam allowance left to put the zip in without an issue.


Overall, I'm generally pleased with the fit - close fitting as it's designed to be, but not tight or uncomfortable - good fun to dance in! The side bust darts are a bit too high, and I think that's what has caused the rippling along the side boob (teehee) - I'm not practiced enough at recognising every issue in a muslin, but I'm pretty chilled about this as I think it's a skill that will come in time. Other bits of rippling I think can be attributed to the shell fabric interacting with the lining (a plain pink cotton from Goldhawk Road) as it doesn't feel ill fitting. But again, I think little things like this will come in time.


Would I have worn this dress had we been invited to the full day of the wedding, and been part of formal photos rather than just the evening of drinking and dancing....? Probably not. I was quite disheartened by the ripply circle hem which took several painstaking evenings of hand stitching and looks pretty bad close up (I'm not deliberately fishing for compliments - I've not shown you any really close up pics of the hem because I'm too embarrassed). However, when I showed it to my fiance Chris, after having sent him a few depressed emails at work about how upset I was about it, he duly remarked 'I don't know what you're on about, it looks great!' :) So that clinched it and I wore it to the wedding rather than falling back on the shop bought dress I was considering wearing instead.

And how can I linger on the poor hem when a circle skirt is this much fun:  


I also got my first totally unsolicited sewing compliment from a stranger at the wedding. Not from my fiance, family, friends, or colleagues, who all know I sew, but a fellow wedding guest who said she loved my dress and the lining and where was it from? I said I made it myself but no it wasn't my profession, just my hobby. Happy times :)

Any tips on the bits I had trouble with would be much appreciated! Have you made anything for a special occasion recently?

31 July 2014

Pistachio and polkadot shirtdress

Hi!


For my first post I'm excited to share with you a dress of which I'm very proud. This is my pistachio and polkadot shirtdress, made from McCalls 6696 using a nice cotton poplin from Clothkits in Chichester. I'd seen this dress on a number of different sewing blogs and thought it would be both a practical dress to own and also a reasonable sewing challenge. I made the version with sleeves and the full pleated skirt and I'm reallly pleased with how it turned out.


This is actually the first commercial pattern I've used and I read a lot of reviews before deciding which size to cut. I anticipated a lot of ease and after having a good think about the finished garment measurements (which took ages to find on the packet flap!) I cut out a size 8 and made a muslin of the bodice. I decided the bodice felt a little short, and tight at the waist, so I lengthened it by half an inch and added one and a half inches at the waist. I probably added too much to the waist, but I think the shape still looks flattering; I have a lot of freedom of movement, and it's been perfectly cool to wear in the recent summer heat. I also shortened the skirt (I am only 5'2" - I shorten the bottom half of everything) but I just chopped the hem at the end of the process rather than making the change to the pattern.


These photos were taken after a whole day at work in this dress. For me, this generally indicates a successful project, but it is rather creased. I find ironing incredibly tedious so I skipped doing it in favour of taking pictures - sorry about my wrinkly armpits! I've found the poplin does crease quite easily - which I suppose is good for the skirt pleats. The colour is a little greener than in these pics, which look rather grey. You can see the bodice is slightly roomy, but I think the evening light has exaggerated this. It doesn't look this big in real life.


I'm a little disappointed that the collar sits so flat- it would be nice if it stood up more - like the type on a man's shirt. I use a cheap fusible interfacing that I bought three meters of ages ago, so I've been slowly using it up. I think a better quality, heavier interfacing would help. If anyone had any recommendations as to where I can buy some online I'd be grateful!


When it came to actually sewing the collar, this is the first time the whole process hasn't been a massive bag of stress, as I had the help of this well known, excellent tutorialI did run into into trouble when I discovered both the collar stand and outer collar were far too big for the neckline. I know sometimes a little bit of easing in is required, but when I measured it up there was a whole two inches excess, not including the seam allowance. I'm fairly certain I didn't make a mistake when cutting out the pattern - as I cut the smallest size it would have been difficult to mess this up. Of course, I only realised this was an issue after all my fabric had been used up, so couldn't cut out new pieces. Instead, I chopped each collar piece down the middle, overlapped two inches less the seam allowance, and sewed them back up. As you can see above this has resulted in a seam down the back of the collar, but it's not too noticeable and my hair covers it up much of the time.


The quality of this dress really benefited from my recent acquisition of an edgestitch foot for my sewing machine. My topstitching in previous garments has quite frankly been piss-poor because I've only had my standard foot. Ugly top stitching is an eyesore and it's ruined the look of many an otherwise good dress or top of mine. So I'm very pleased with all my topstitching on this dress! 


Here's an indoor picture that shows the truer colour. What do you think of our wallpaper? It came with the house and we don't currently have a redecorating budget so you're allowed to tell me it's gross!


All in all, I'm very happy with this shirtdress, making it was enjoyable and it stretched my sewing skills just the right amount. I was so thrilled with this that right after I'd finished, I immediately went back to the drawing board and started making another version, this time sleeveless and with the straight skirt. I've run into a few problems with that one, but it's nearly finished so stay tuned. 


For the moment, I'm just happy wearing this dress out and about in the lovely sunshine :) Have you made anything great for the summer recently?